UnityPy를 이용한 bundle파일 내 Monobehaviour 일괄수정
텍스트가 모두 .bundle 파일 안에 들어있고, 대사 파일이 여기저기 파편화되어 있기에
방법을 찾아보다 UnityPy라는 모듈을 사용하게 되었다.
이 게시글에선 특정 방법만을 다룰 것이나, 쉽게 응용이 가능하다.
본문의 1번 항목에선 많은 뻘짓을 다루고 있으니, 실질적인 수정작업은 2번부터 보면 될 것 같다.
예시 게임: Later Alligator ( https://store.steampowered.com/app/966320/Later_Alligator/ )
---
1. 텍스트 검색

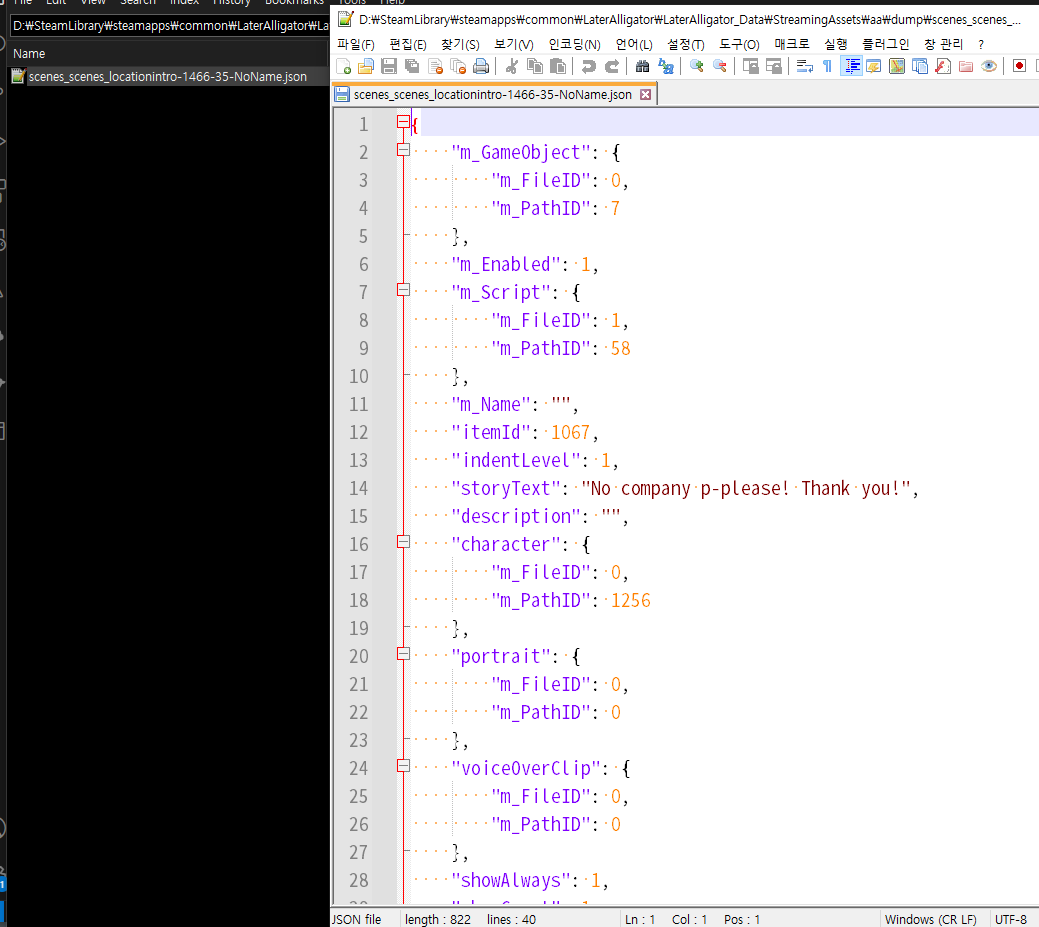
게임을 시작한 후 처음으로 등장하는 대사이다.
"No company p-please! Thank you!"
일단 위 텍스트가 어디에 들어있는지 검색해 보자.
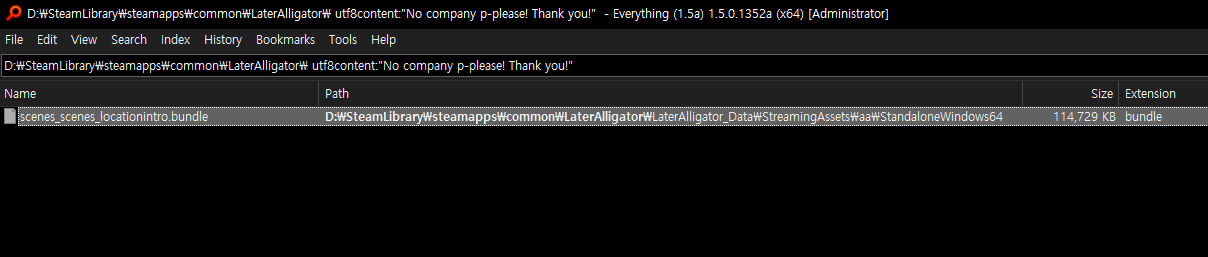
scenes_scenes_locationintro.bundle 파일에 들어있다.
해당 번들 파일의 Monobehaviour를 모두 추출해서 몇 번 에셋에 들어있는지 찾아보자.
"Say"로 검색하면 될 것 같다.
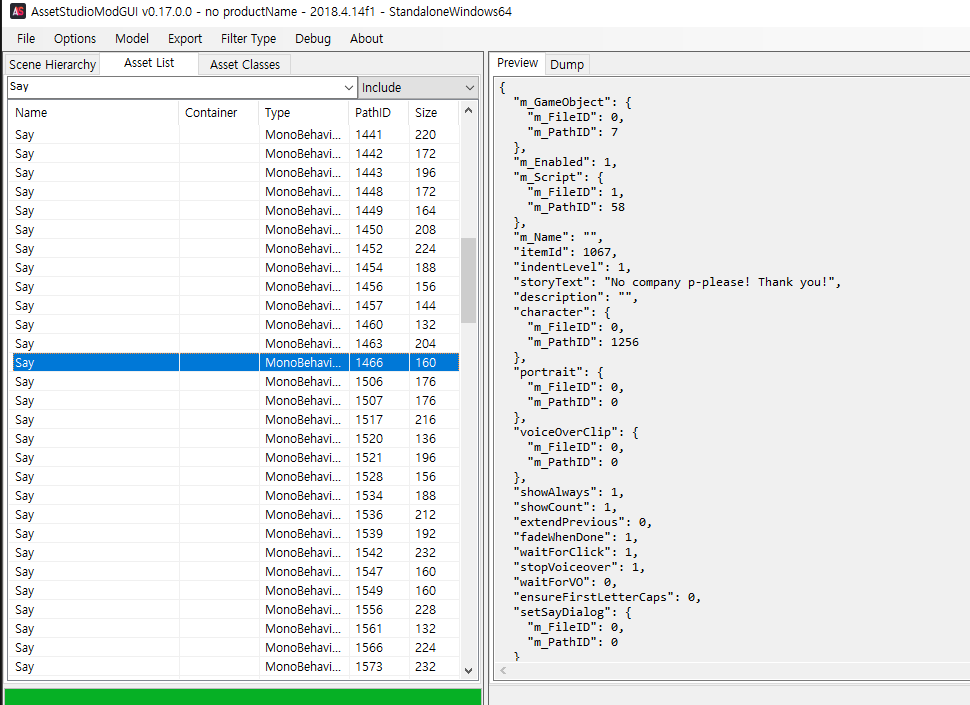
이름이 Say인 에셋이 한두 개가 아니다. 이걸 하나하나 작업하려면 죽어난다는 소리다.
아무튼, 일단 1466번 에셋임을 확인하였다.
UABE로 열어보자.
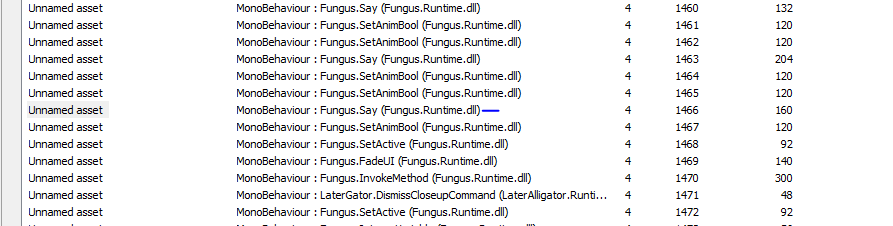
여기선 Unnamed asset으로 보인다.
Type 별로 정렬하여 Fungus.Say 부분만 일괄 추출해서 수정할 수 있으나,
번들 파일이 많으므로 분명 텍스트가 더 많이 있으리라 생각했다.
일단 UnityPy 모듈을 이용해서 여러 정보를 알아내 보자.
UnityPy github을 보면 사용법이 이런 식으로 되어있다.
( https://github.com/K0lb3/UnityPy )
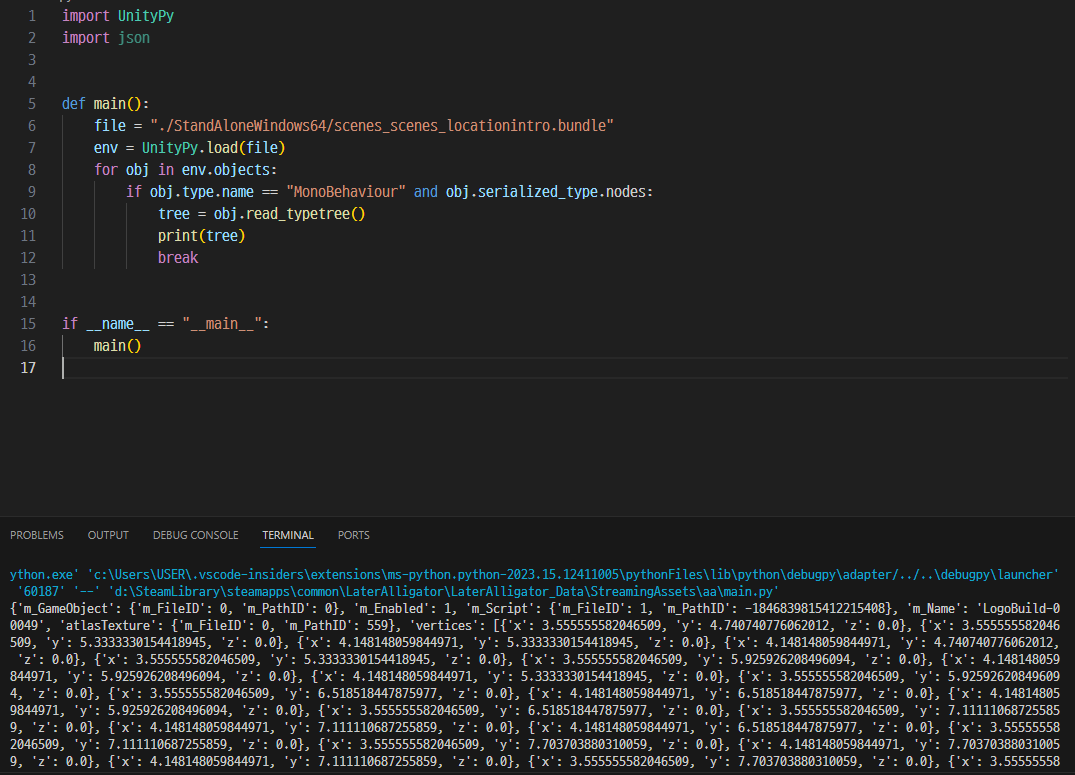
번들 파일을 UnityPy.load()를 이용해 로드한 후, 오브젝트를 쭉 순회하며 .type.name이 MonoBehaviour인 것들에 대한 작업을 수행한다.
일단 tree 변수에 어떤 데이터가 저장되어 있는지 알아보기 위해 print를 찍어보면, dict 데이터가 나온다.
print(tree) 및 break를 지우고, 모든 MonoBehaviour가 덤프 떠질 수 있도록 해보자.
import UnityPy
import json
import os

# fmt: off
def main():
    filename = "./StandAloneWindows64/scenes_scenes_locationintro.bundle"
    clean_filename = os.path.splitext(os.path.basename(filename))[0]
    env = UnityPy.load(filename)
    for obj in env.objects:
        if obj.type.name == "MonoBehaviour" and obj.serialized_type.nodes:
            tree = obj.read_typetree()
            name = tree["m_Name"] if tree["m_Name"] != None and tree["m_Name"] != "" else "NoName"
            with open(f"./dump/{clean_filename}-{obj.path_id}-{obj.type_id}-{name}.json", "w", encoding="utf-8") as f:
                json.dump(tree, f, ensure_ascii=False, indent=4)


if __name__ == "__main__":
    main()
이왕 작업하는 거, 파일명이라도 좀 깔끔하게 나오도록 해보자.
tree가 dict 데이터니까, 만약 m_Name 필드가 있으면 그걸 이름으로 정하고, 아니라면 NoName이 기재되도록 했으며
obj.path_id는 에셋의 pathid,
obj.type_id는 에셋의 type id(위 경우 "Say" 묶음들이 같은 type id임)이다.
dump 폴더를 만든 후 코드를 실행해 보자.
type_id가 35인 걸 알 수 있다.
코드를 조금 수정해서 type_id가 35인 것들만 뽑아내 보자.
import UnityPy
import json
import os

# fmt: off
def main():
    filename = "./StandAloneWindows64/scenes_scenes_locationintro.bundle"
    clean_filename = os.path.splitext(os.path.basename(filename))[0]
    env = UnityPy.load(filename)
    for obj in env.objects:
        if obj.type.name == "MonoBehaviour" and obj.serialized_type.nodes and obj.type_id == 35:
            tree = obj.read_typetree()
            name = tree["m_Name"] if tree["m_Name"] != None and tree["m_Name"] != "" else "NoName"
            with open(f"./dump/{clean_filename}-{obj.path_id}-{obj.type_id}-{name}.json", "w", encoding="utf-8") as f:
                json.dump(tree, f, ensure_ascii=False, indent=4)


if __name__ == "__main__":
    main()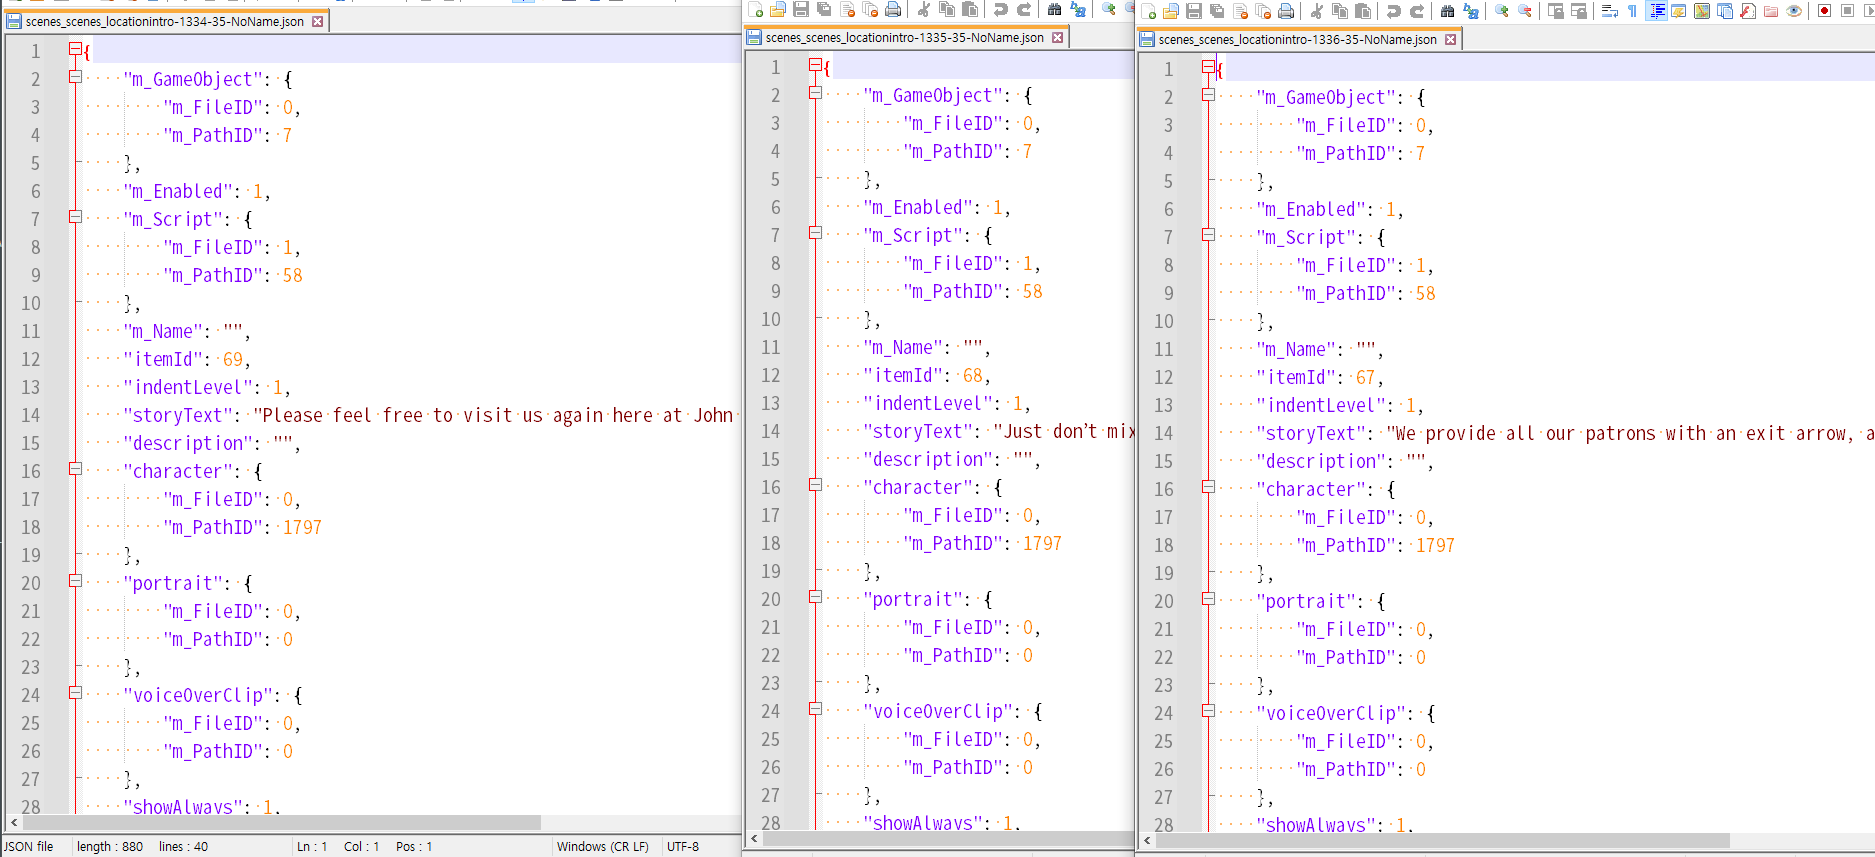
드디어 모든 "Say"에 해당하는 Monobehaviour들이 덤프 되었다.
그런데, type_id를 기준으로 삼자니 다른 번들에선 그 기준이 동일하게 적용이 안 되는 문제가 발생하였다.
동일한 번들 파일 내 파편화가 심한 경우, type_id를 기준으로 수정하는 것이 유효하겠고,
이것과 같이 여러 번들 파일 내 동일한 형태의 MonoBehaviour가 많은 경우 공통점을 이용한 수정이 유효하겠다.
작업자분이 다른 몇 개의 텍스트 예시를 더 찾아주셔서, 그걸 토대로 공통점을 파악해 보았다.
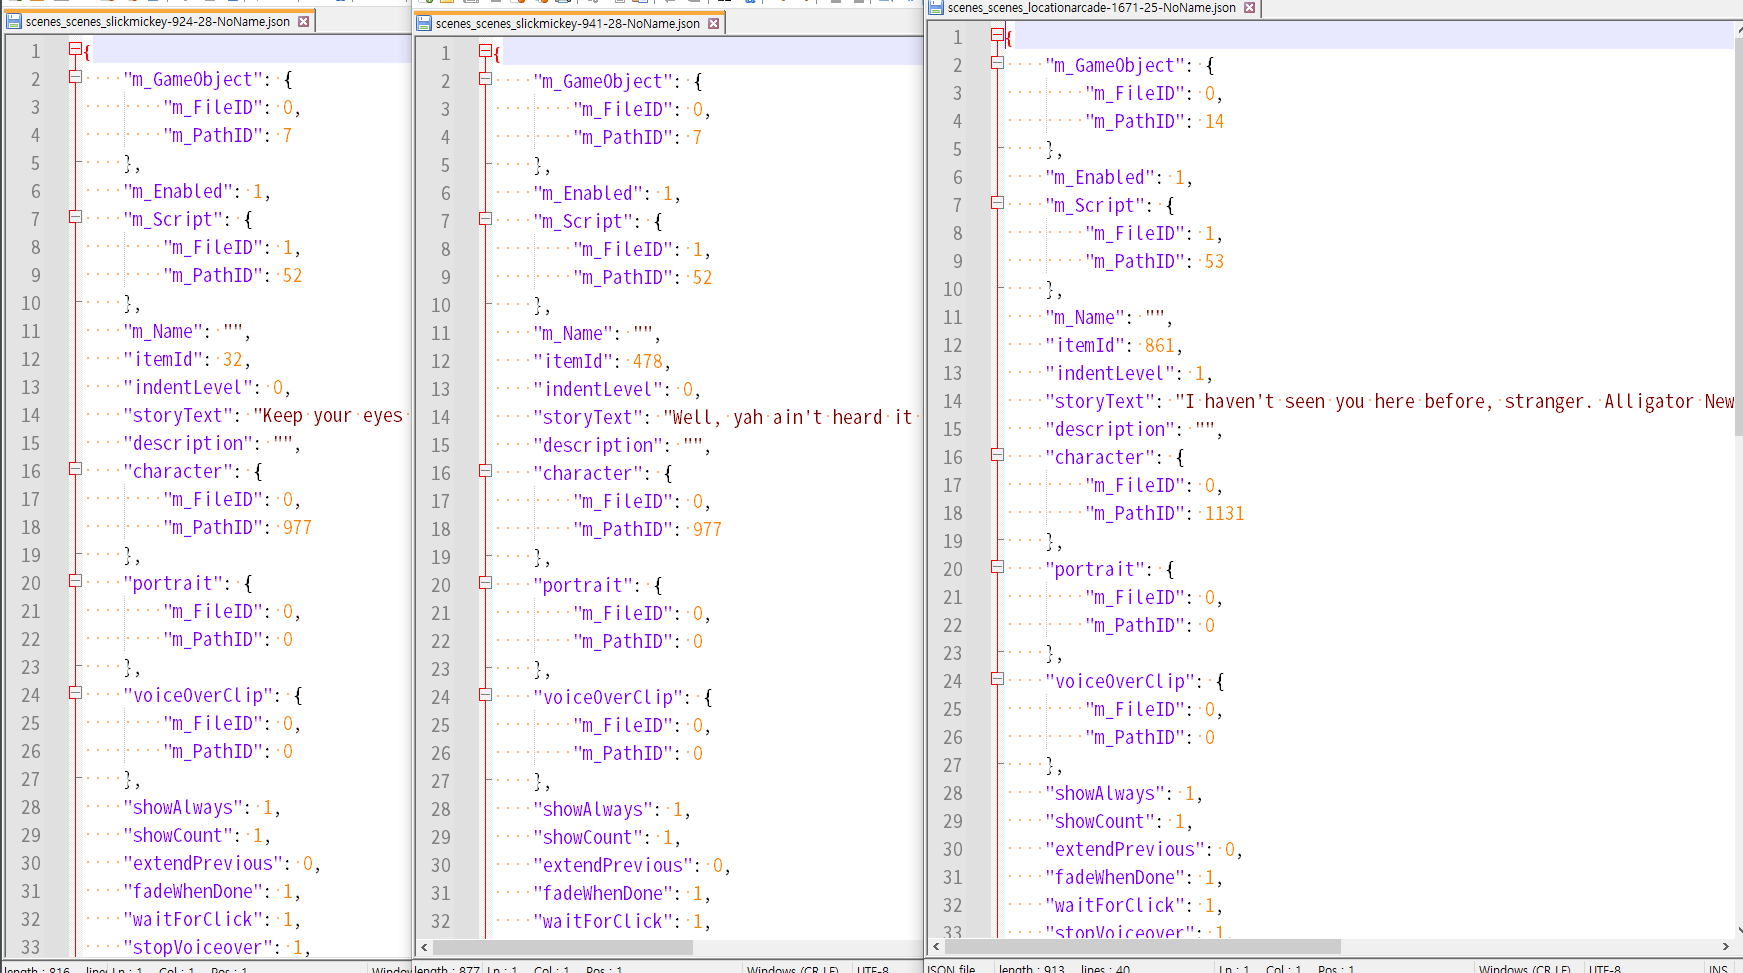
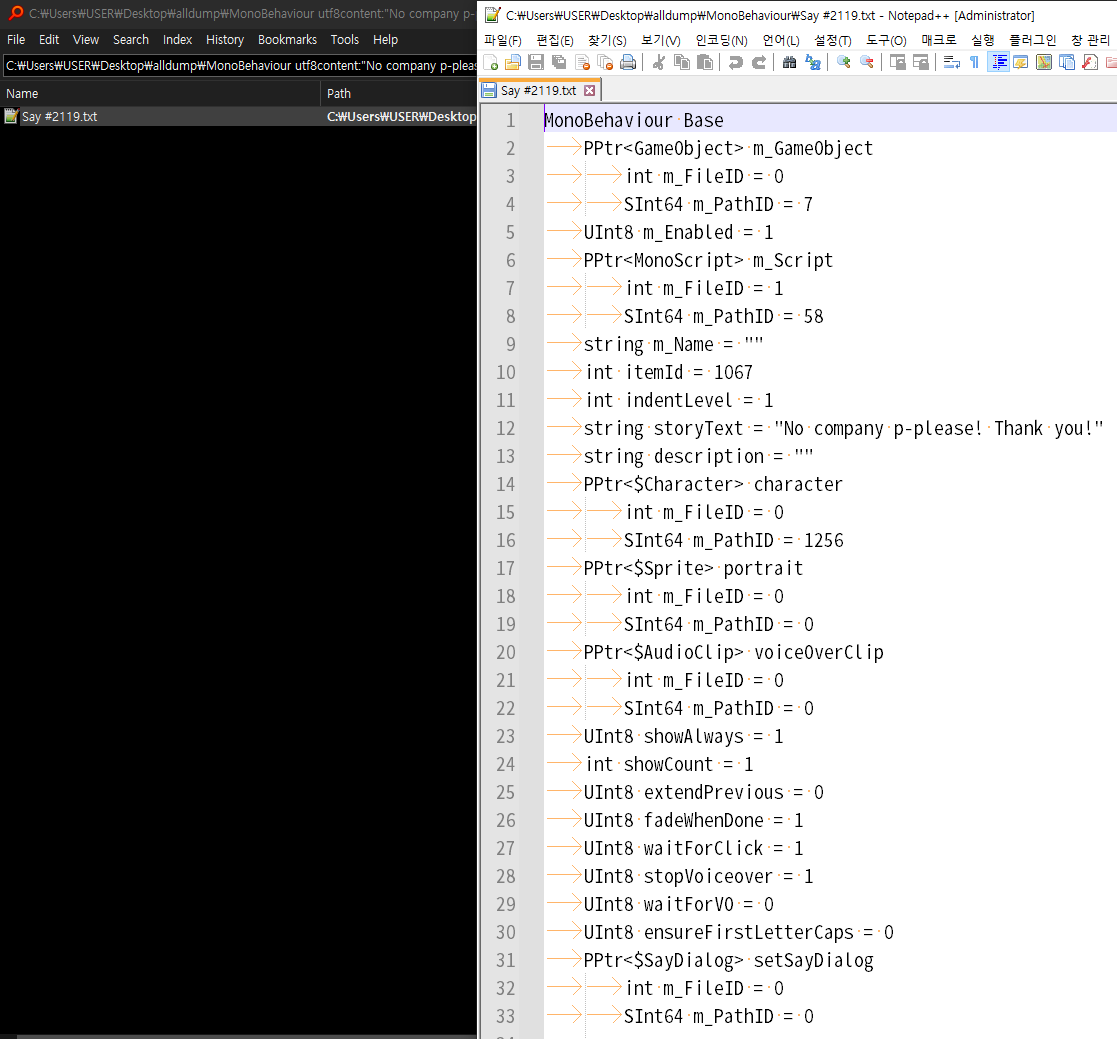
에셋이 속해있는 번들이 달라지면 type_id도 달라지지만, storyText 키는 그대로 있다.
또한, itemId가 있으며 고유한 값으로 사용되는 것 같았고, character의 m_PathID가 지정되어 있다.
그래서 이러한 고유한 특징을 토대로, 대사만 출력되도록 코드를 수정하였다.
2. CSV 파일로 텍스트 추출
import UnityPy
import json
import os

# fmt: off
def work(filename):
    clean_filename = os.path.splitext(os.path.basename(filename))[0]
    env = UnityPy.load(filename)
    for obj in env.objects:
        if obj.type.name == "MonoBehaviour" and obj.serialized_type.nodes:
            tree = obj.read_typetree()
            if tree.get('storyText') == None:
                continue
            if tree.get('itemId') == None:
                continue
            if tree.get('character') == None:
                continue
            if tree.get('character').get('m_PathID') == None:
                continue
            text = tree.get('storyText')
            item_id = tree.get('itemId')
            character_id = tree.get('character').get('m_PathID')
            print(f"{clean_filename} | {item_id} | {character_id} | {text}")


def main():
    filename_lst = [i for i in os.listdir("./StandaloneWindows64") if i.endswith(".bundle")]
    for filename in filename_lst:
        work(f"./StandaloneWindows64/{filename}")

if __name__ == "__main__":
    main()
딕셔너리 객체에다가 .get 메서드를 사용하면
해당 키가 있다면 값을 리턴하고, 없다면 None을 이용한다. 이것을 활용해 try-except문을 줄였다.
텍스트가 있는 키인 'storyText', 고유값인 'itemId', 'character' 및 'character' 내부 'm_PathID'까지
.get 메서드와 if문으로 유효성 검사를 하였다.
이러면 이제 추출에 필요한 모든 값이 있는 정상적인 경우에만 결과가 출력될 것이다.
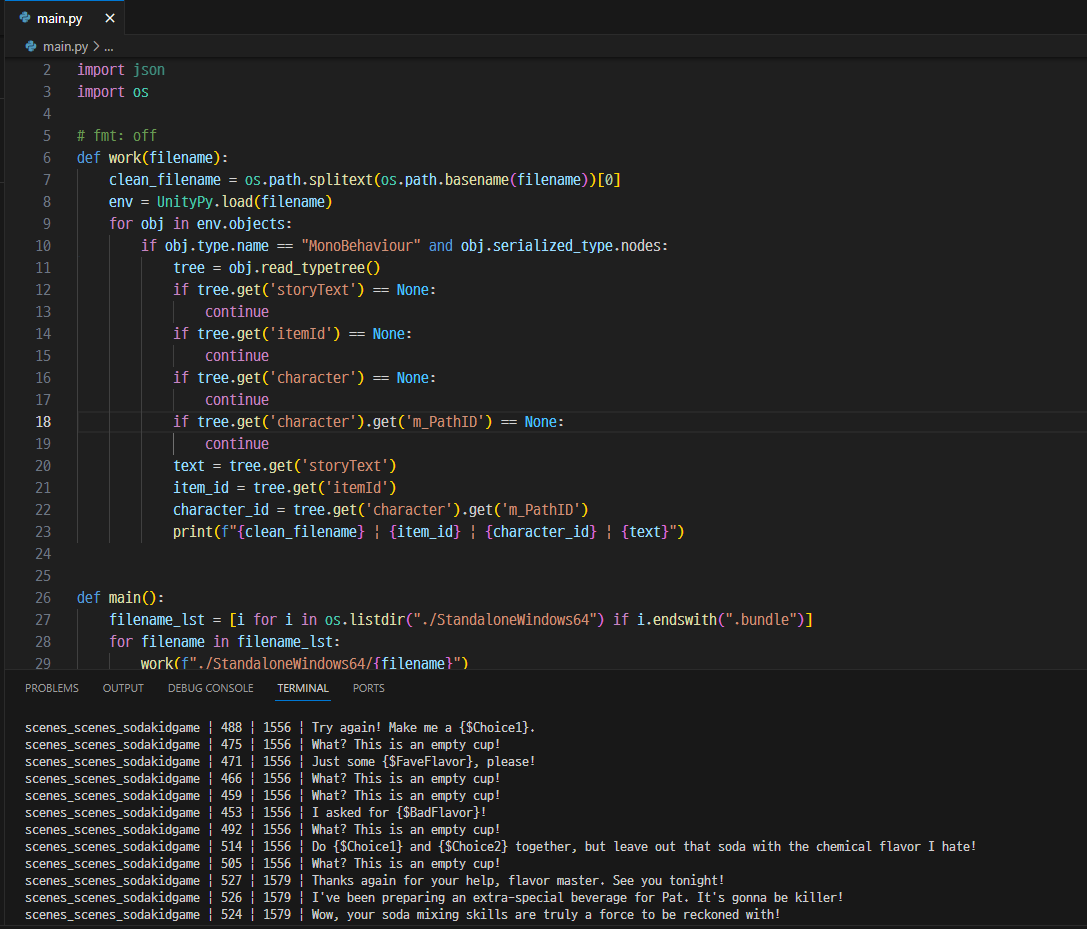
전부 정상적으로 나온다.
테스트를 마쳤으니 이제 CSV 파일로 작성해 보자.
import UnityPy
import json
import os
import csv


def sanitize_text(text):
    return text.replace("\r\n", "\\r\\n").replace("\n", "\\n").replace("\r", "\\r")


# fmt: off
def work_export(filename):
    with open("text.csv", "a", encoding="utf-8", newline="") as f:
        writer = csv.writer(f, quoting=csv.QUOTE_ALL)
        clean_filename = os.path.splitext(os.path.basename(filename))[0]
        env = UnityPy.load(filename)
        for obj in env.objects:
            if obj.type.name == "MonoBehaviour" and obj.serialized_type.nodes:
                tree = obj.read_typetree()
                if tree.get('storyText') == None:
                    continue
                if tree.get('itemId') == None:
                    continue
                if tree.get('character') == None:
                    continue
                if tree.get('character').get('m_PathID') == None:
                    continue
                text = sanitize_text(tree.get('storyText'))
                item_id = tree.get('itemId')
                character_id = tree.get('character').get('m_PathID')
                writer.writerow([clean_filename, item_id, character_id, text, ""])


def export_bundle():
    with open("text.csv", "w", encoding="utf-8", newline="") as f:
        writer = csv.writer(f, quoting=csv.QUOTE_ALL)
        writer.writerow(["filename", "item_id", "character_id", "src", "dst"])
    filename_lst = [i for i in os.listdir("./StandaloneWindows64") if i.endswith(".bundle")]
    for filename in filename_lst:
        work_export(f"./StandaloneWindows64/{filename}")

if __name__ == "__main__":
    export_bundle()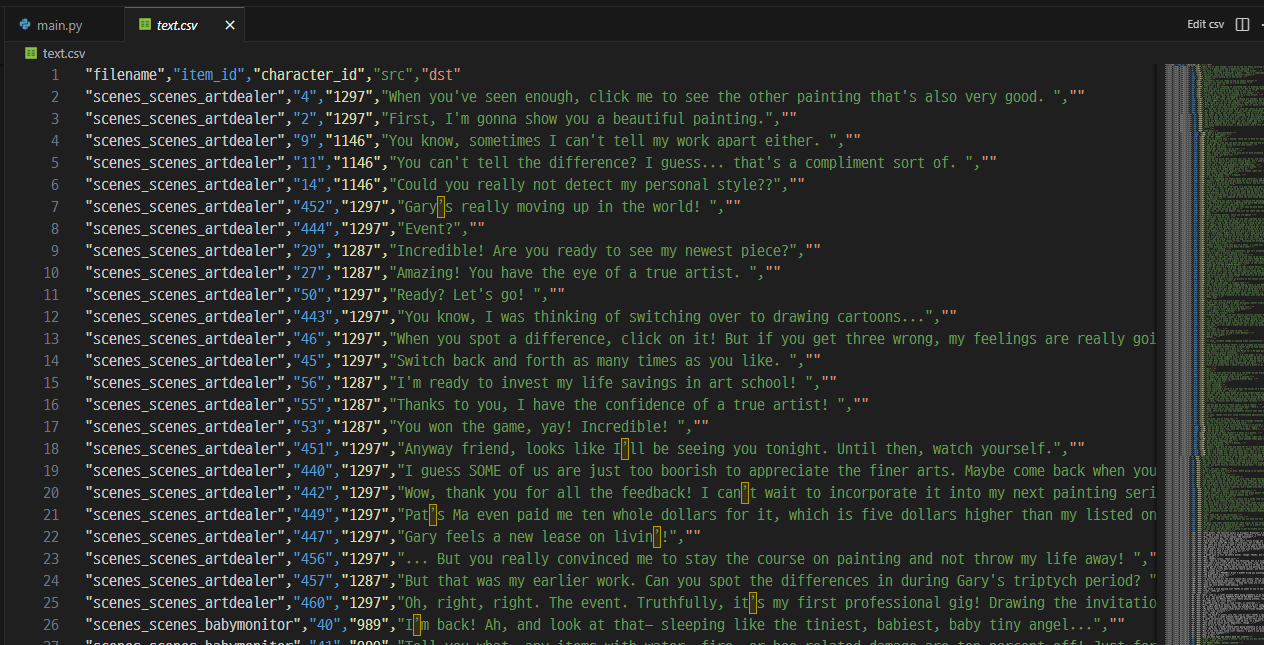
개인 취향 문제로, \r이나 \n같은 이스케이프 문자를 모두 변환하여 한 줄로 만들었다.
또한, quoting 옵션을 csv.QUOTE_ALL로 주었다.
정상적으로 모든 텍스트가 추출된 것을 볼 수 있다.
이제 5번째 열 (dst 컬럼)에다가 번역하면 된다.
3. 번역한 텍스트를 번들에 삽입
조립은 분해의 역순이라 하지 않았는가?
텍스트를 추출할 때 사용했던 방법과 동일하게 진행한 후, dict 데이터의 원문 부분을 번역문으로 교체하는 파트를 작성하고, typetree를 저장하면 끝난다.
(참고: https://github.com/K0lb3/UnityPy#monobehaviour )
비슷한 내용의 코드가 한 개 더 생기는 것이니, 아예 다른 .py 파일로 작성하여 진행하겠다.
    with open("./text.csv", "r", encoding="utf-8", newline="") as f:
        reader = list(csv.reader(f))
        del reader[0]
        translate_dict = {}
        for i in reader:
            if i[0] not in translate_dict:
                translate_dict[i[0]] = {}
            translate_dict[i[0]][i[1]] = {
                "item_id": i[1],
                "character_id": i[2],
                "src": i[3],
                "dst": i[4],
            }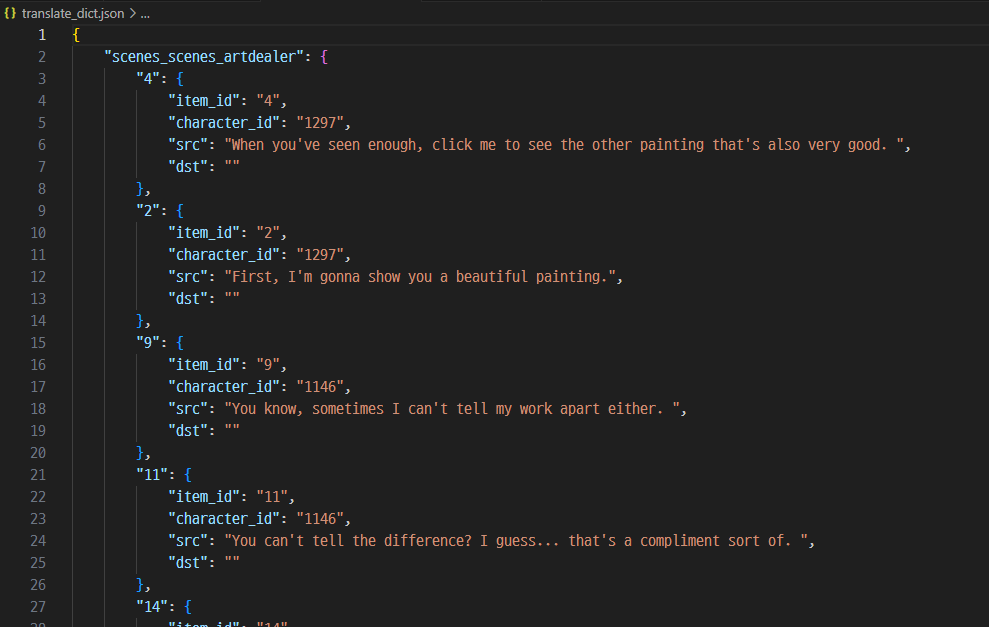
일단, CSV를 이용해 딕셔너리를 만든다. 내가 번역문을 불러올 때 주로 사용하는 방법이다.
위 경우 i[0]이 번들 파일명, i[1]이 item_id, i[2]가 character_id, i[3]이 원문, i[4]가 번역문이다.
dict 구조로 보자면 아래 사진과 같이 될 것이다.
고유한 값인 번들 파일명과 고유한 값인 item_id를 기반으로 CSV에 있는 값들을 집어넣었다.
    filename_lst = [
        filename
        for filename in os.listdir("./StandaloneWindows64")
        if filename.endswith(".bundle") and os.path.splitext(filename)[0] in translate_dict
    ]
작업할 번들 파일 목록 작성도 좀 특이하게 진행해야 한다.
CSV에 번들 파일명이 기록되어 있으니, 작업하지 않아도 되는(CSV에 내용이 작성되어있지 않은) 파일은 패스할 수 있다.
이를 통해 작업시간을 단축할 수 있다.
import UnityPy
import json
import os
import csv
from pprint import pprint


def restore_text(text):
    return text.replace("\\r\\n", "\r\n").replace("\\n", "\n").replace("\\r", "\r")


# fmt: off
def work_import(filename, translate_dict):
    edit_switch = False
    clean_filename = os.path.splitext(os.path.basename(filename))[0]
    env = UnityPy.load(filename)
    for obj in env.objects:
        if obj.type.name == "MonoBehaviour" and obj.serialized_type.nodes:
            tree = obj.read_typetree()
            if tree.get('storyText') == None:
                continue
            if tree.get('itemId') == None:
                continue
            if tree.get('character') == None:
                continue
            if tree.get('character').get('m_PathID') == None:
                continue
            item_id = str(tree.get('itemId'))
            # 번역된 것이 없다면 건너뛰기
            if translate_dict[clean_filename][item_id]["dst"] == "":
                continue
            translated = restore_text(translate_dict[clean_filename][item_id]["dst"])
            tree["storyText"] = translated
            edit_switch = True
            obj.save_typetree(tree)
    if edit_switch:
        with open(f"./StandaloneWindows64_new/{clean_filename}.bundle", "wb") as f:
            f.write(env.file.save())


def import_bundle():
    with open("./text.csv", "r", encoding="utf-8", newline="") as f:
        reader = list(csv.reader(f))
        del reader[0]
        translate_dict = {}
        for i in reader:
            if i[0] not in translate_dict:
                translate_dict[i[0]] = {}
            translate_dict[i[0]][i[1]] = {
                "item_id": i[1],
                "character_id": i[2],
                "src": i[3],
                "dst": i[4],
            }
    filename_lst = [
        filename
        for filename in os.listdir("./StandaloneWindows64")
        if filename.endswith(".bundle") and os.path.splitext(filename)[0] in translate_dict
    ]
    for filename in filename_lst:
        work_import(f"./StandaloneWindows64/{filename}", translate_dict)

if __name__ == "__main__":
    import_bundle()
이것이 내가 최종적으로 사용한 전체 코드이다.
sanitize_text() 함수를 수정하여 수정했던 이스케이프 문자를 복구시키고,
work_import() 함수를 수정하여 번역문을 불러오도록 하였다.
수정 이후 obj.save_typetree(tree)를 하여 수정한 dict 데이터가 저장되도록 하였고
f.write(env.file.save())를 하여 수정된 번들 데이터가 저장되도록 하였다.
edit_switch라는 bool 변수를 통해, 번들 파일이 실질적으로 수정된 경우에만 저장하도록 하였다.
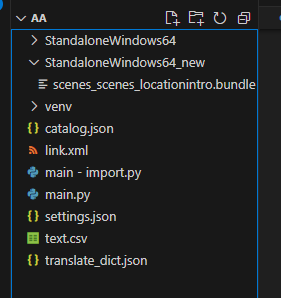
저장 폴더를 보니, 새로운 파일이 하나 생겼다.
원래 번들 폴더에다가 덮어써 버리자.
4. 결과
텍스트가 잘 수정된 것을 볼 수 있다!